Part 2: External LED
In this exercise we will build a circuit with an LED. Then, we will make it blink.
Build the Circuit
- Power the circuit from the arduino.
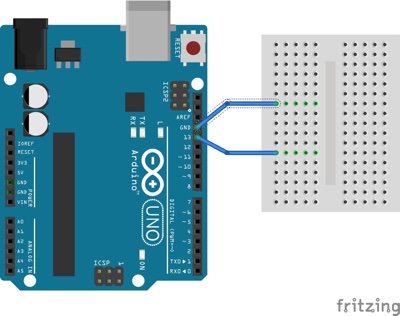
- Place a wire from pin 13 on the arduino to a row on the breadboard.
- Place a wire from the GND pin on the arduino to a different row on the breadboard.
- Your circuit should look like this.

- Include an LED in the circuit
- Look at your LED. Observe that one leg is longer than the other. The long leg is the positive side.
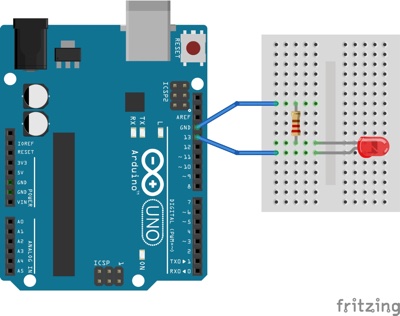
- Place the positive leg of the LED in the same row as the pin 13 wire from the arduino.
- Use the resistor to connect the GND from the arduino and the short leg of the LED.
- Your circuit should look like this.

Flash the Light
- Make sure your code for blinking the LED is open in the arduino IDE.
- Make sure your arduino is plugged into your computer.
- Run the code.
- Watch the light blink.
